XNET Solana Migration, Part 1#
Welcome to our XNET Token Bridge Guide! In this document, we'll walk you through the detailed steps for migrating your XNET tokens across different networks, ensuring a smooth transition from Polygon or Ethereum to Solana. Please follow each step carefully and refer to the provided resources to make this process as seamless as possible. LFG!
Note
If you already bridged your tokens via Wormhole and want to claim the official $XNET Solana token, See Solana Migration, Part 2.
For the purposes of this document, when we refer to the original Polygon XNET we will refer to it as (P)XNET, for ETH wrapped XNET we will use (EW)XNET, for Wormhole(Portal Bridge) wrapped XNET will use (W)XNET, and for the final migrated token on Solana we will refer to it as just (XNET).
The process flow for migrating tokens goes as follows:
(P)XNET -> (W)XNET -> XNET
(EW)XNET -> (W)XNET -> XNET
Notes and Important Considerations:
Tip
- You must use a desktop browser for this process paired with Phantom Wallet.
- You must use a browser that does not have any other wallet installed/enabled except MetaMask and Phantom wallets.
- You may have to disable Phantom wallet extension to connect Metamask to the first part of the bridge then re-enable it when connecting Solana wallet with phantom
- You will need about $5 USD equivalent of MATIC and $5 USD equivalent of SOL to complete this bridge.
Note
This process is tested to work. Be very sure you follow this process exactly.
If you do not follow these bridge instructions, you’re on your own. We can not, unfortunately, support every combination of app, wallet, chain, etc. Please watch this video and follow along while reading the instructions: XNET Token Bridge How-to
Bridging from Polygon to Solana#
Note
This documentation assumes you use MetaMask or another Polygon/ERC20 wallet and are bridging XNET tokens to Phantom wallet.
Step-by-Step Instructions#
Step 1: Install Phantom Wallet
-
Download and install the Phantom Wallet extension to your web browser from the official website.
-
If you have never created a Solana wallet before, follow the instructions from the official Phantom wallet guide to create a new Solana wallet.
Step 2: Add some SOL to Your Wallet
-
Ensure you have some Solana (SOL) in your new wallet before continuing.
-
Recommended methods for acquiring SOL:
- Coinbase
-
KuCoin
-
You'll need around $5 USD equivalent to SOL to complete the bridge in most cases.
Step 3: Access Wormhole Bridge Advanced Transfer Tool
-
Visit Portal Bridge Advanced Tools using your browser or Phantom’s in wallet’s web3 browser. (You must use the Advance Wormhole bridge to complete the migration)
-
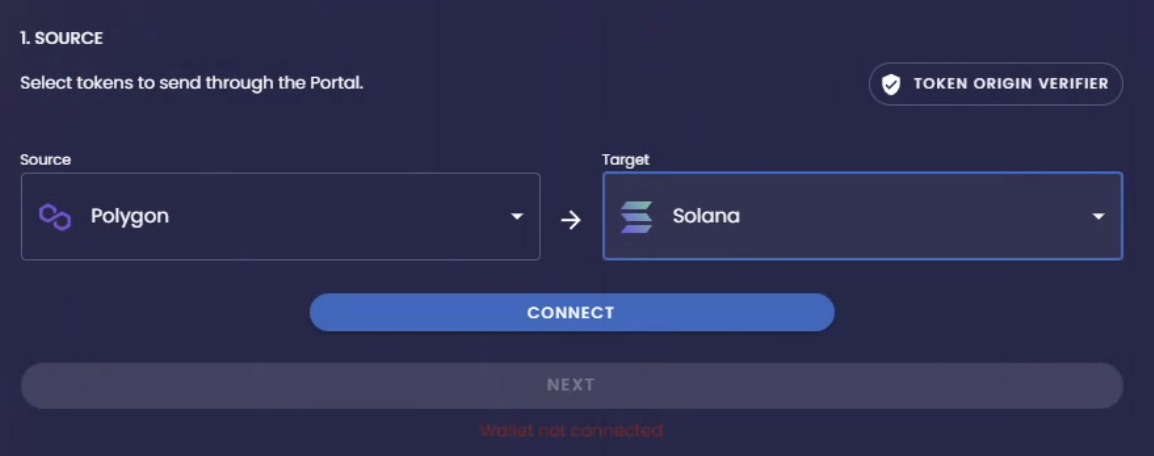
Select either Polygon as “Source” -> and Solana as “Target” or Ethereum as “Source -> and Solana as “Target”, Depending on which your desired source and destination chain.
-
Now click "Connect Wallet," choose Metamask, and confirm. (You may have to disable Phantom wallet extension to connect Metamask to the this part of the bridge then re-enable it when connecting Solana wallet part of the bridge, This happen when Phantom wallet try to take priority over metamask as to which wallet to connect first).
Step 4: Select Correct Token
-
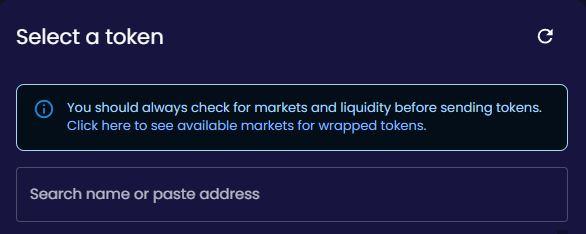
Under "Select a Token," paste the following based on which XNET token chain you are migrating from.
For Polygon use
$(P)XNETcontract address:0xbc5eb84c052fd012bb902c258c9fd241b17c0005For Ethereum use
$(EW)XNETcontract address:0x5393cEeD9a265Bda7952780E5b9413150e666a24 -
The token may appear as “XNET” or “Unknown” Choose the amount (or max) that you want to bridge and click "Next."
Step 5: Connect Your Solana Wallet
-
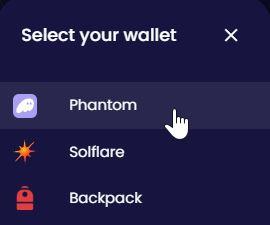
Click "Connect" and choose Phantom from the dropdown list.
-
You will then likely need to “create associated token account”, this will prompt you through a series of confirmations from the phantom wallet.
-
Once the created associated token account is created select “next”.
-
Next confirm the token amount you want to move by selecting “Approve”, A Metamask popup will generate a popup for you to approve the amount to be transferred via you wallet and the token bridge contract. Confirm and approve the transaction, then hit 'Next' in the popup window.
Step 6: Send Tokens
-
Click "Transfer" and confirm the transactions after verifying the amounts.
-
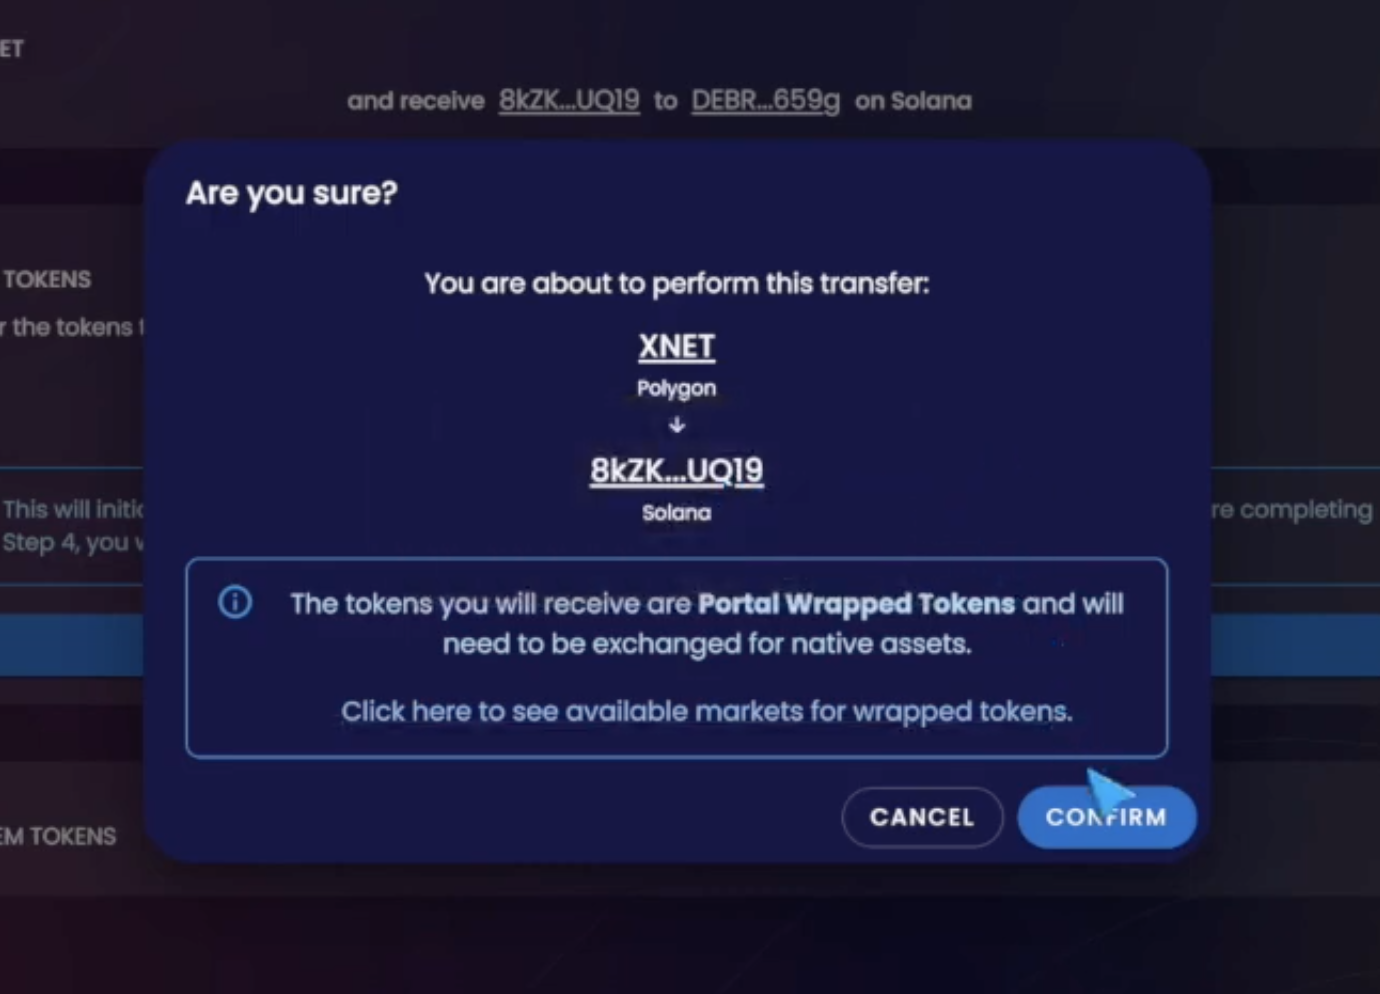
Next you will “confirm” that the tokens are moving from the Source chain to the Target chain in the correct order. A new Metamask transaction confirmation popup will show on your confirmation the transaction and the migration transfer will begin.
Note
This process can take up to 30 minutes during times of high congestion, but typically only takes 2-3 minutes.
Step 7: Redeem Tokens
-
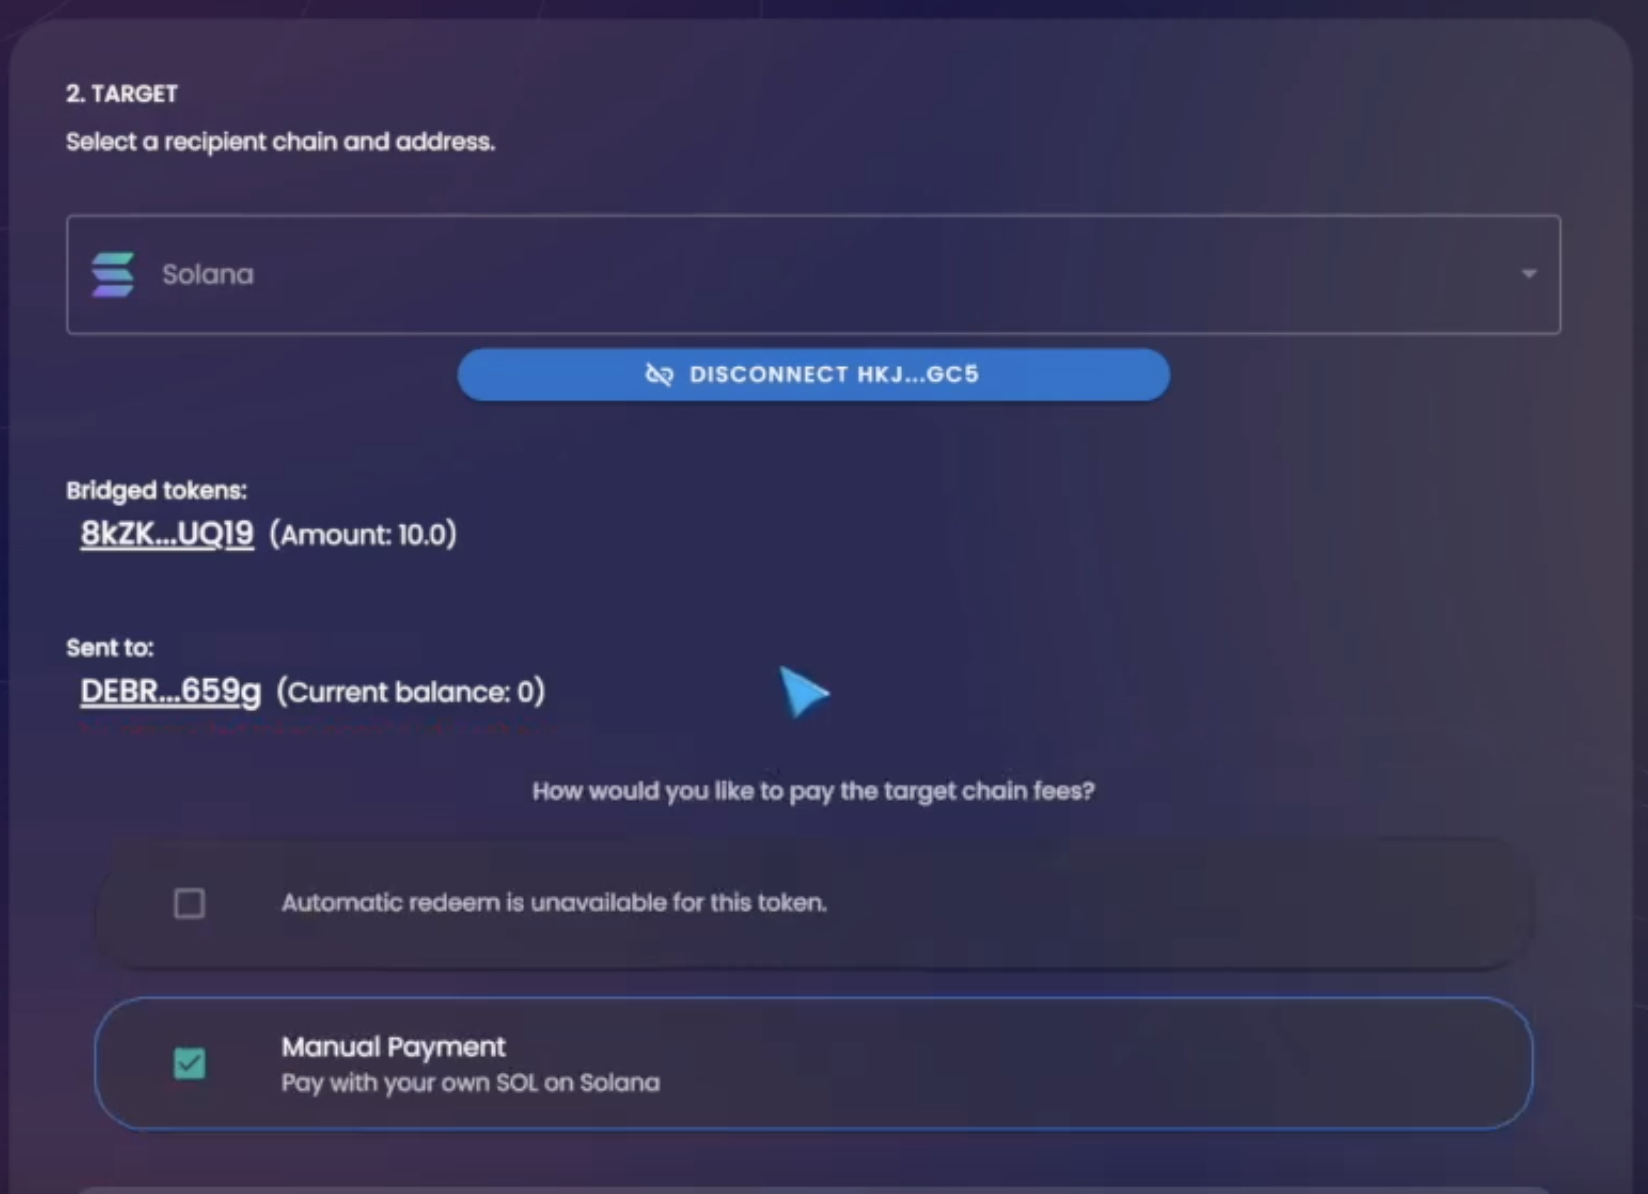
Click the "Redeem" option to finalize the transfer. You will see 4-5 confirmations from the Solana wallet to complete the transfer.
Step 8: Bridge Complete!
