WiFi Reactivation Walkthrough Guide#
Welcome to the XNET WiFi Reactivation Walkthrough Guide! In this guide, we'll walk you through the process of creating your new XNET login account and reactivating your XNET Wi-Fi access points. Please follow each step carefully to ensure a smooth reactivation experience.
Let's get started!
Creating your new XNET Account#
Steps:
-
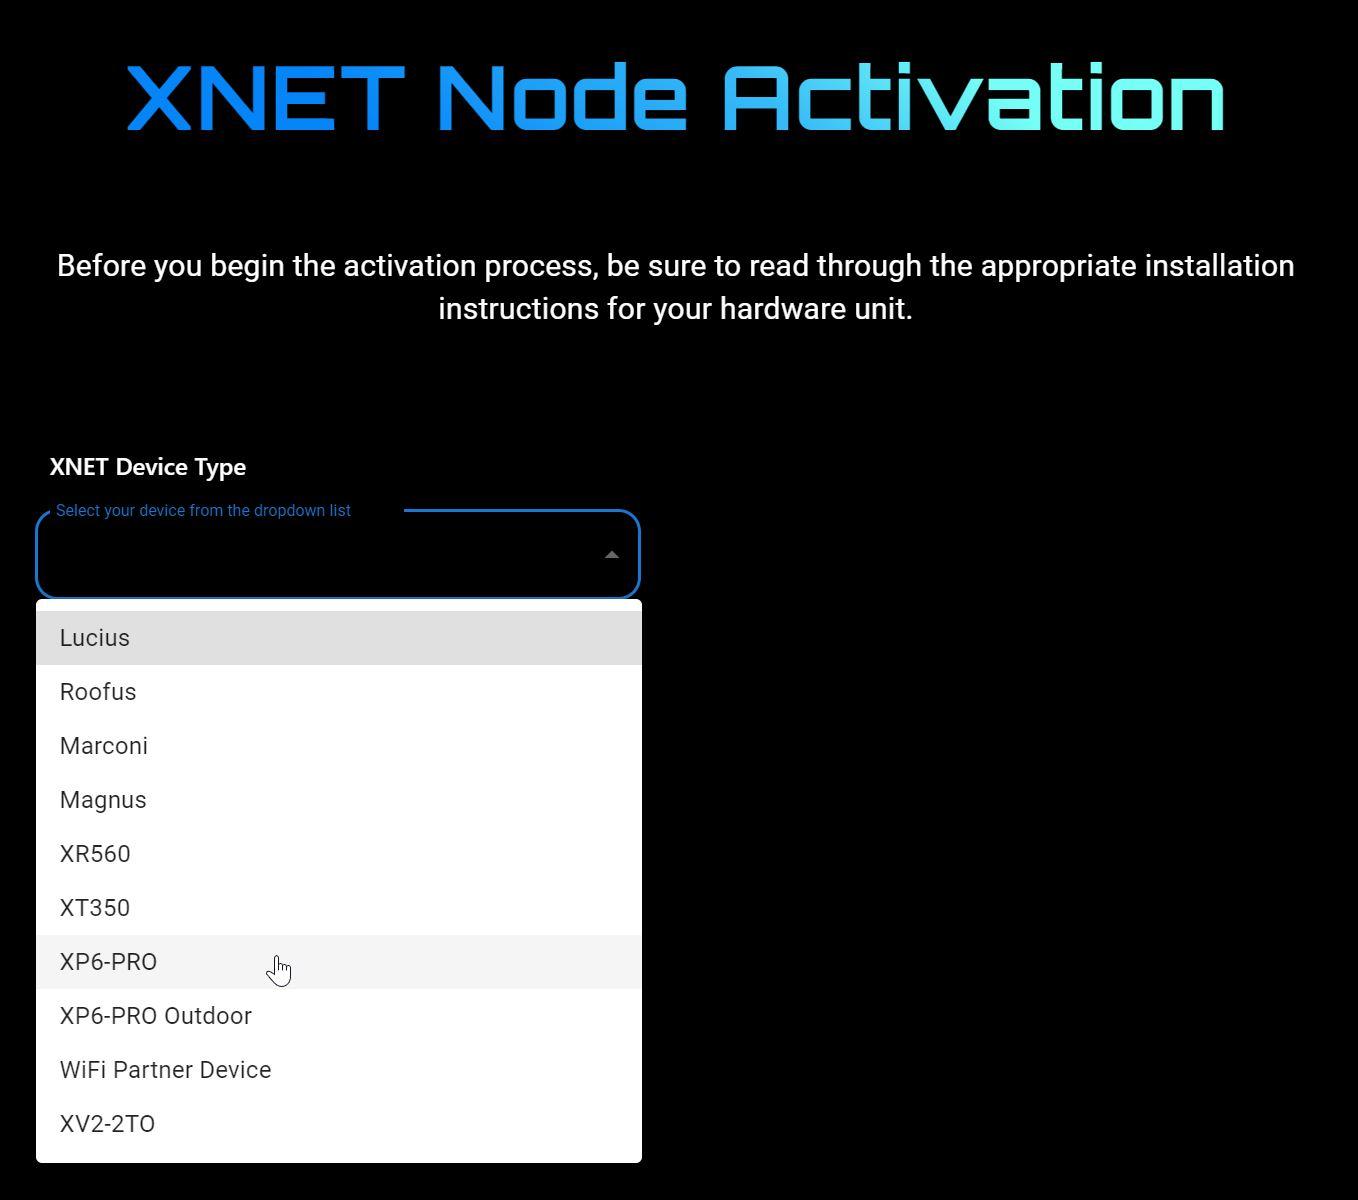
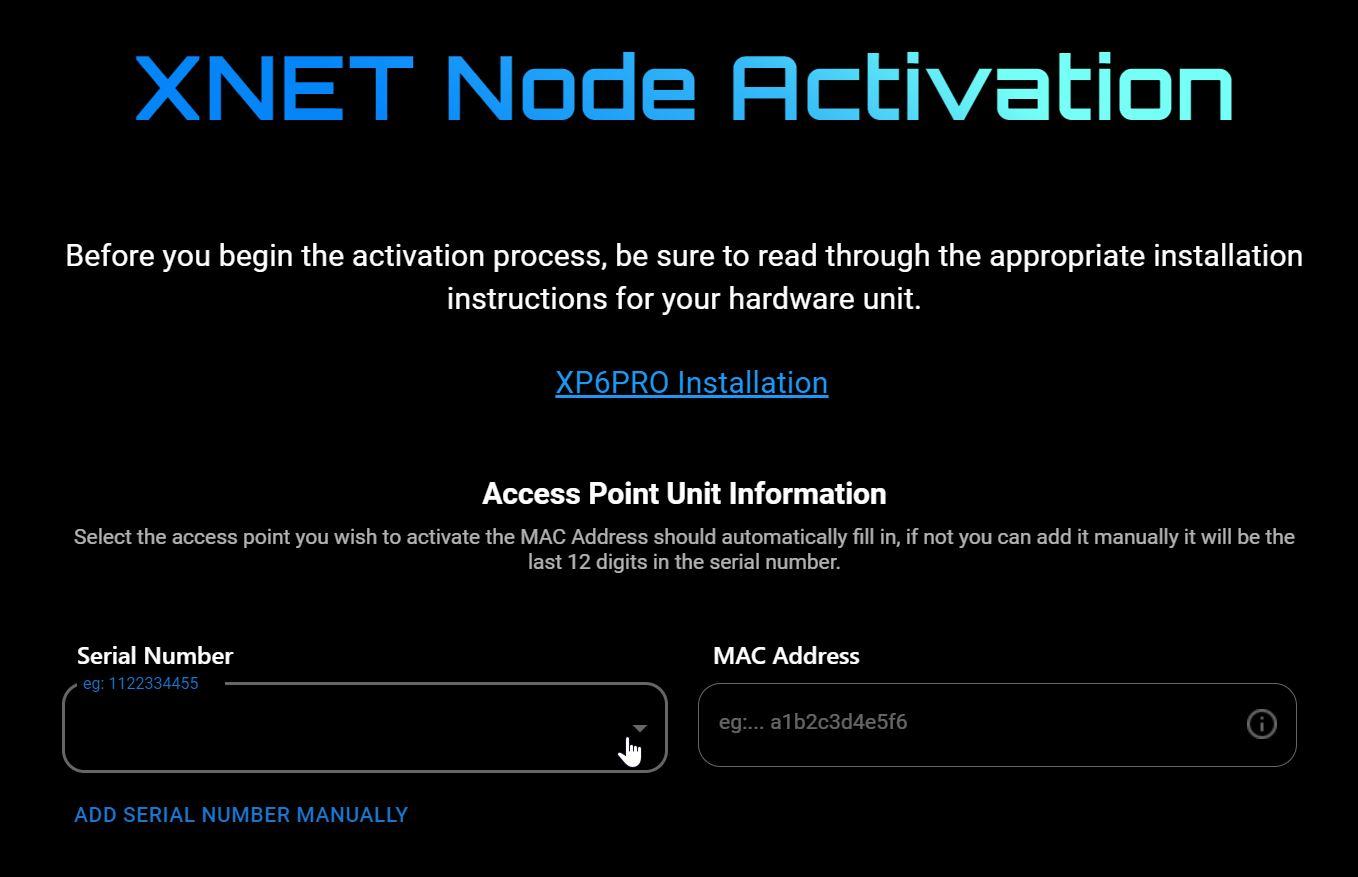
Go to activate.xnet.world and select the Wi-Fi XNET Device Type you need to reactivate.
-
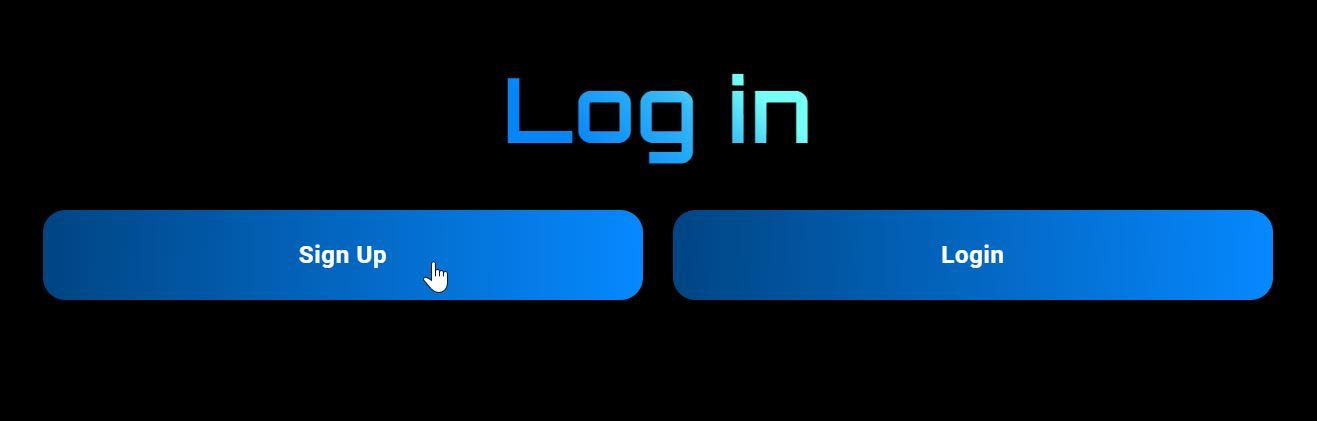
Select Sign Up from the Login Page.
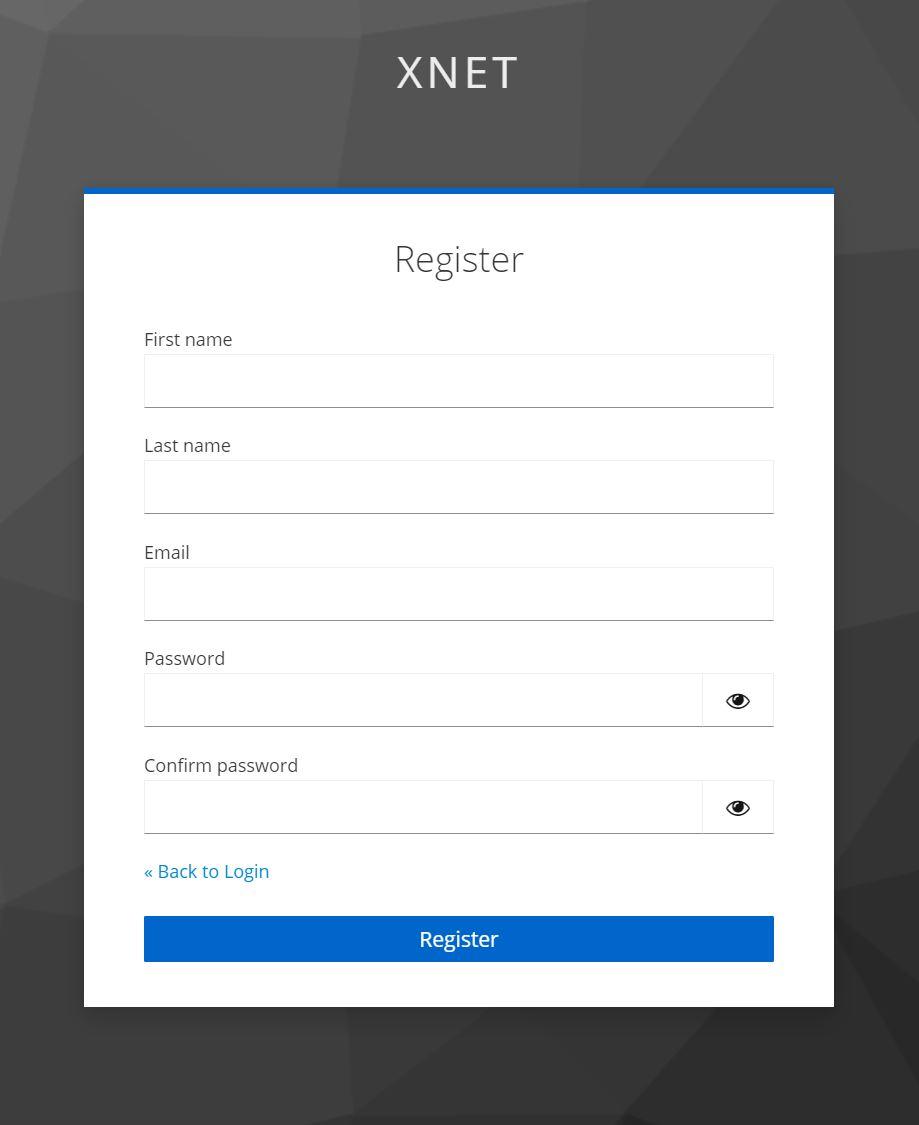
- Create a New XNET login account by filling the required fields.
Note
If you are reactivating, you must use the same email from your previous account login but choose a New Password. Otherwise, you will not be able to see your existing radios.
- Sign into your newly created account with your Email and New Password.
Reactivating Your Wi-Fi Devices#
Steps:
-
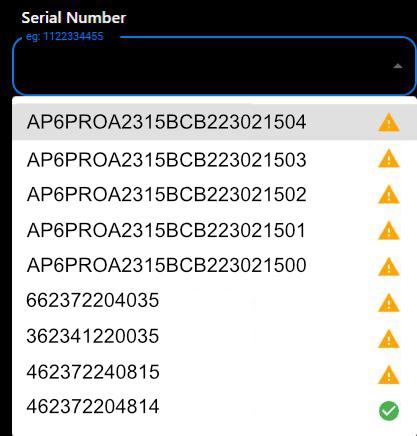
Once logged into the activation portal, choose your device from the “Serial Number” dropdown list. Note: Only your Wi-Fi devices will appear in this activation form. You will see a warning symbol next to every device that has not been reactivated and a check mark next to devices that have been successfully reactivated.


-
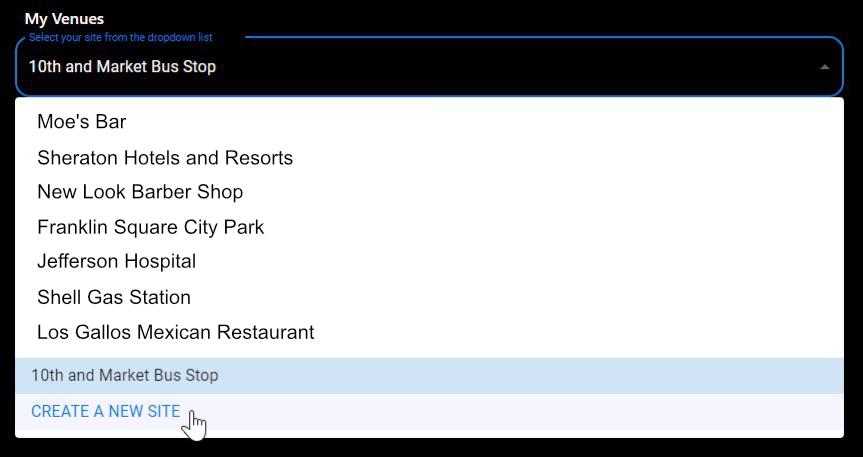
Next, Select a site location from the “My Venues” dropdown field. Ensure that all the relevant fields are filled in for the venue you have chosen, if they are not, update the fields and they will save for that location when you submit the rest of the form.

-
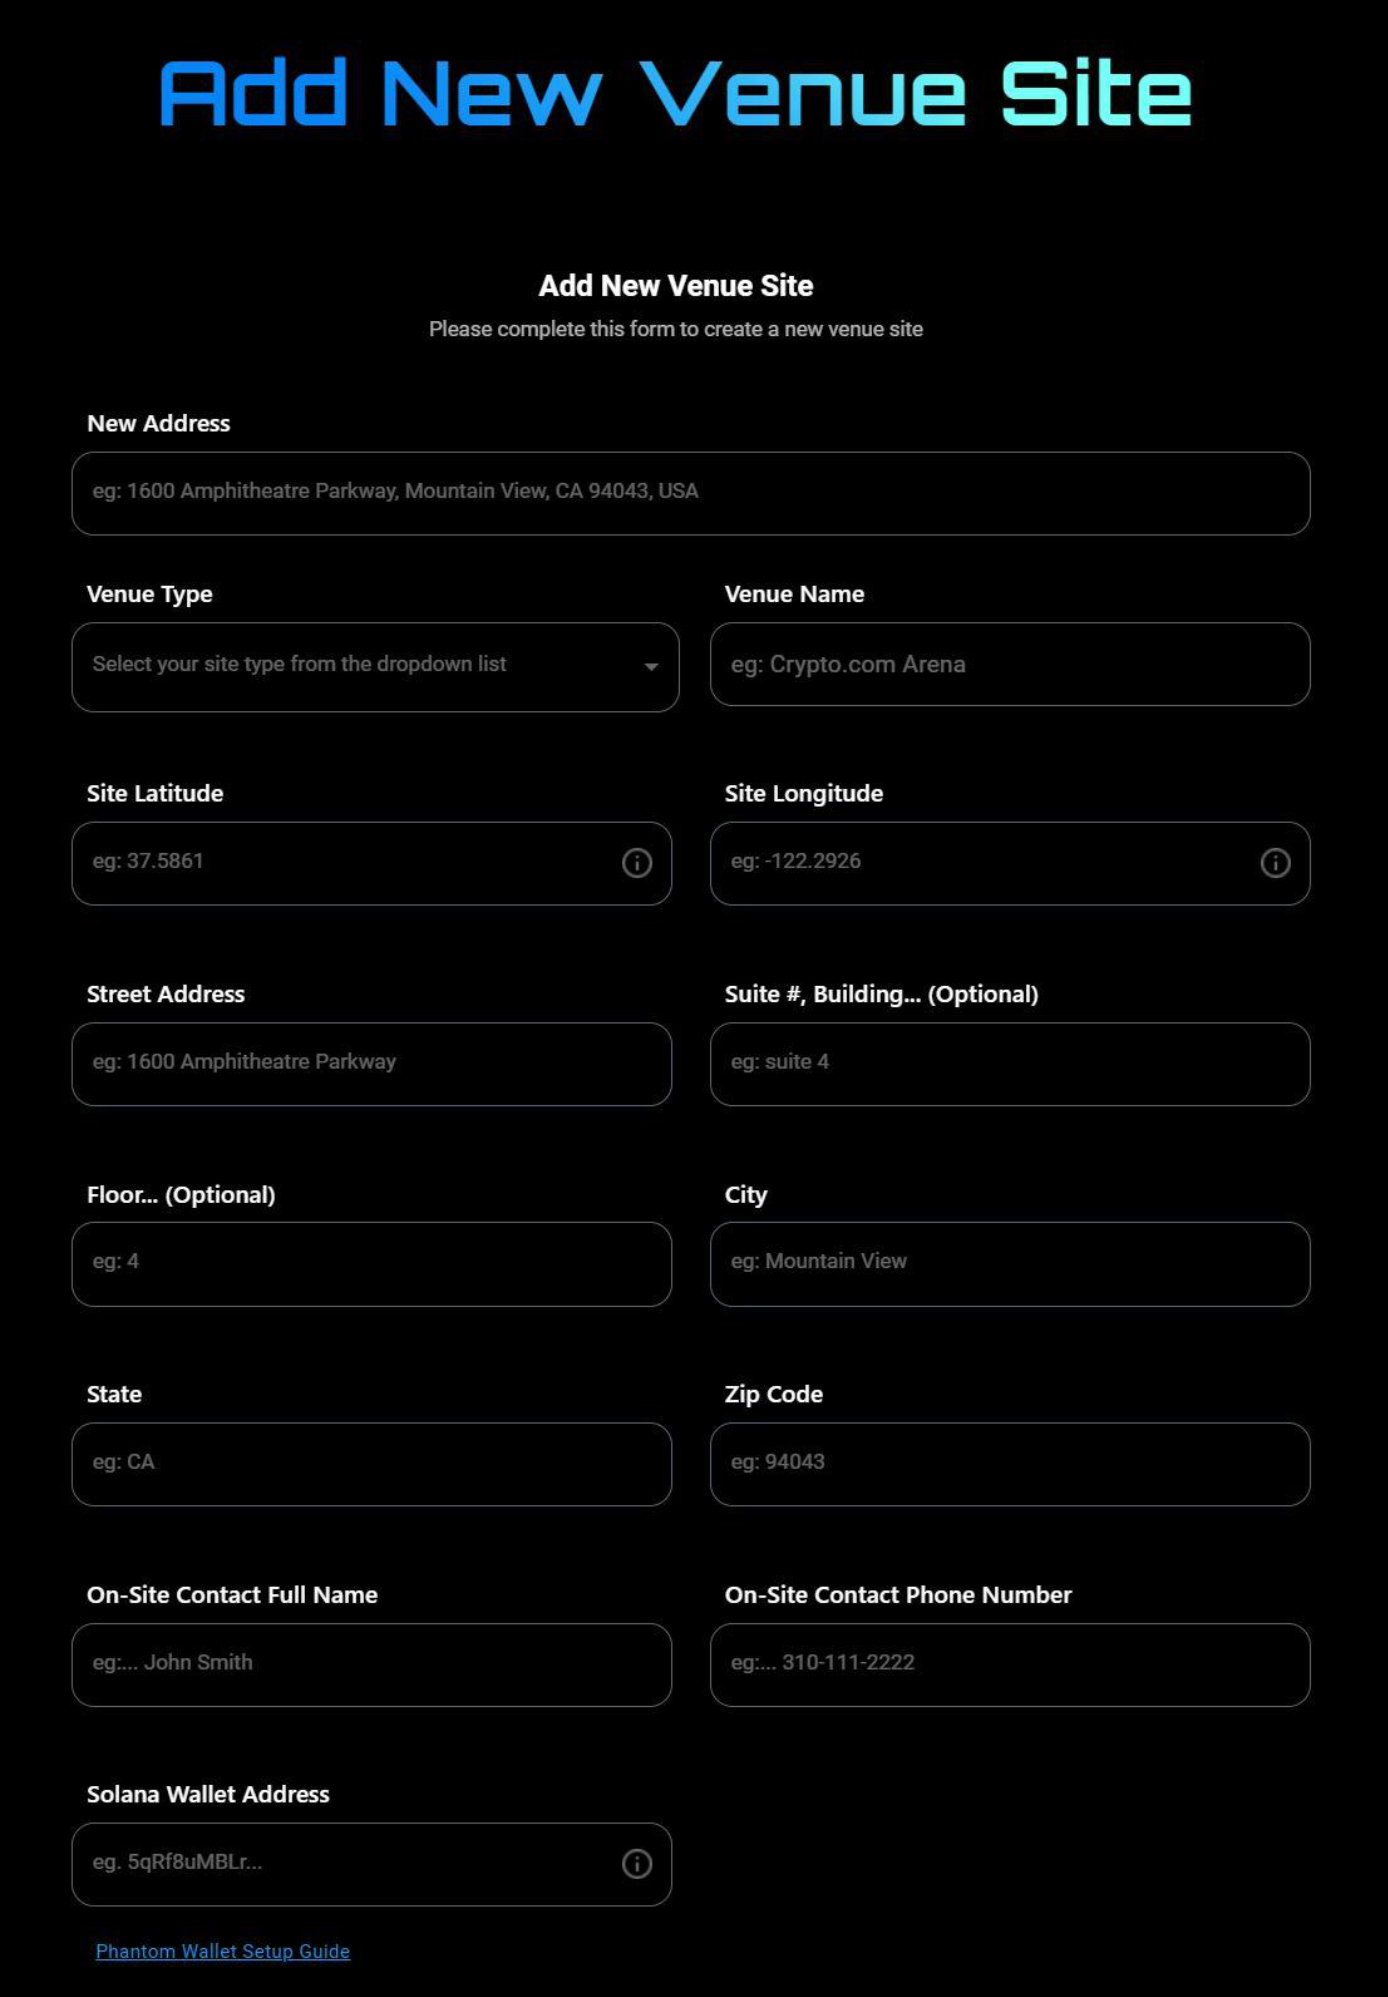
Users now have the option to “Create A New Site” if you don’t see one of your venue locations or need to create a new one. From the My Venues dropdown, select the Create A New Site option. This will bring you to a new page where you can fill in all the relevant information about your new venue. Once you have filled in all the required fields, your new site will show up in the My Venues dropdown as the venue name you assigned it.
-
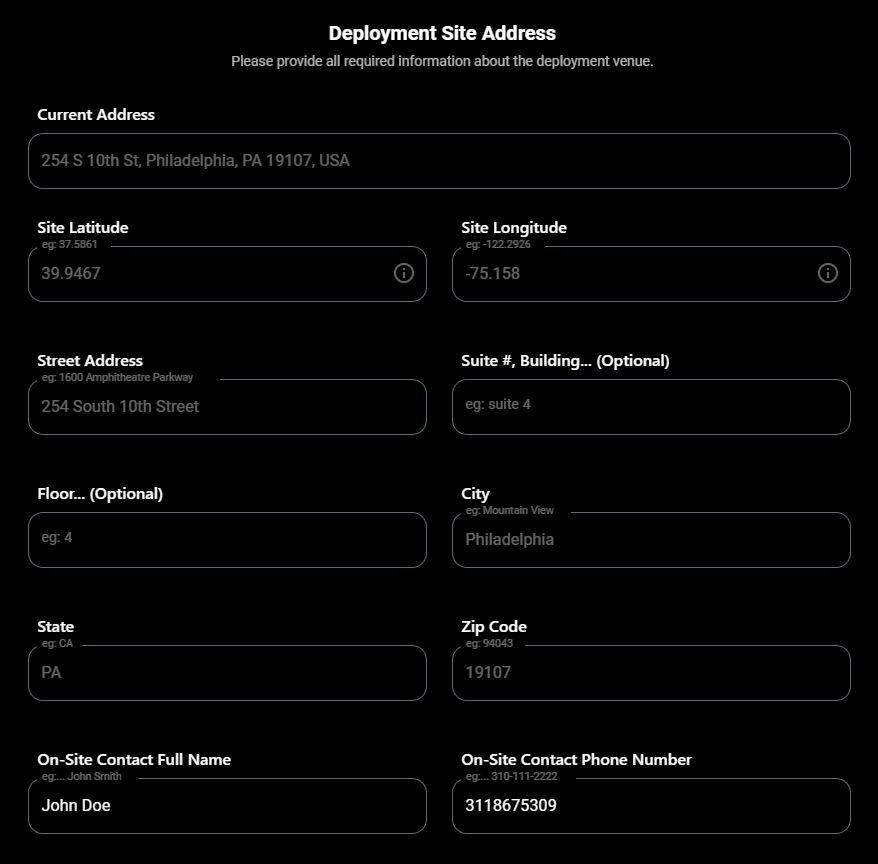
When selecting a deployment site from the My Venues dropdown, it should auto-populate the “Deployment Site Address” fields and other relevant information about the site. Please ensure that the information is correct and that additional site information is included if available, such as Suite, Floor, or Building Number. You will also be required to add the On-Site Contact Full Name & Phone Number.
-
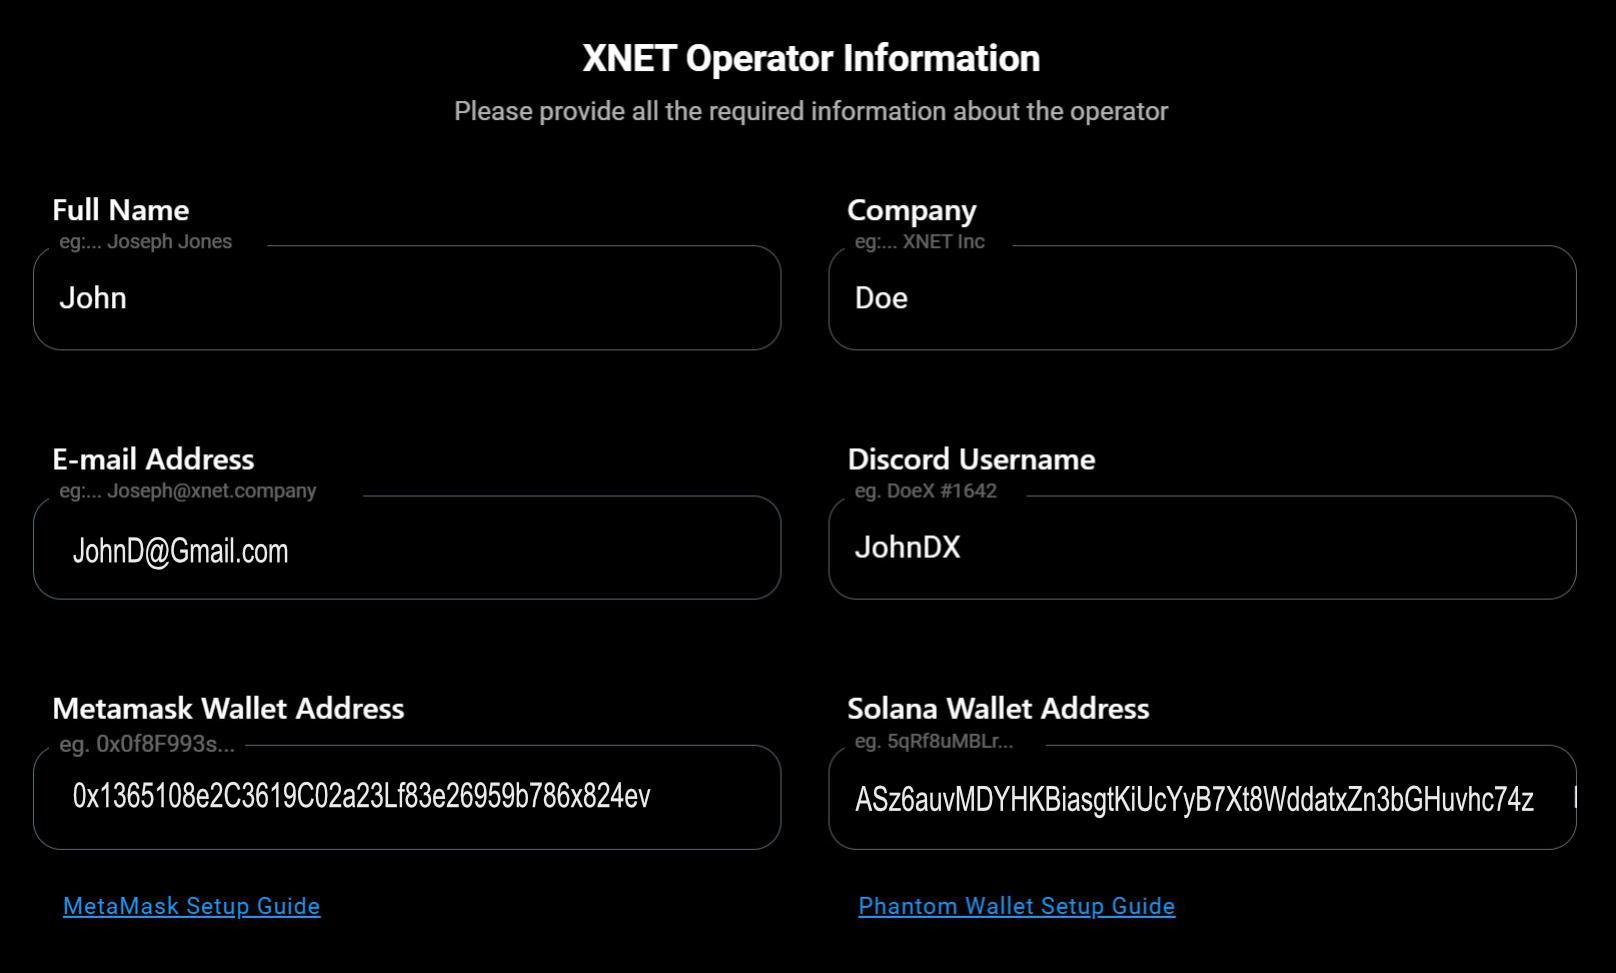
Next Ensure that the “Xnet Operator Information” is correct and filled in for each field. The Email Address, Discord Username and Phantom Wallets Fields will lock after submission so please ensure all the information is correctly filled in.
Warning
You MUST fill in a Solana Wallet Address for our upcoming Solana Token migration to start collecting XNET rewards when the migration is complete.
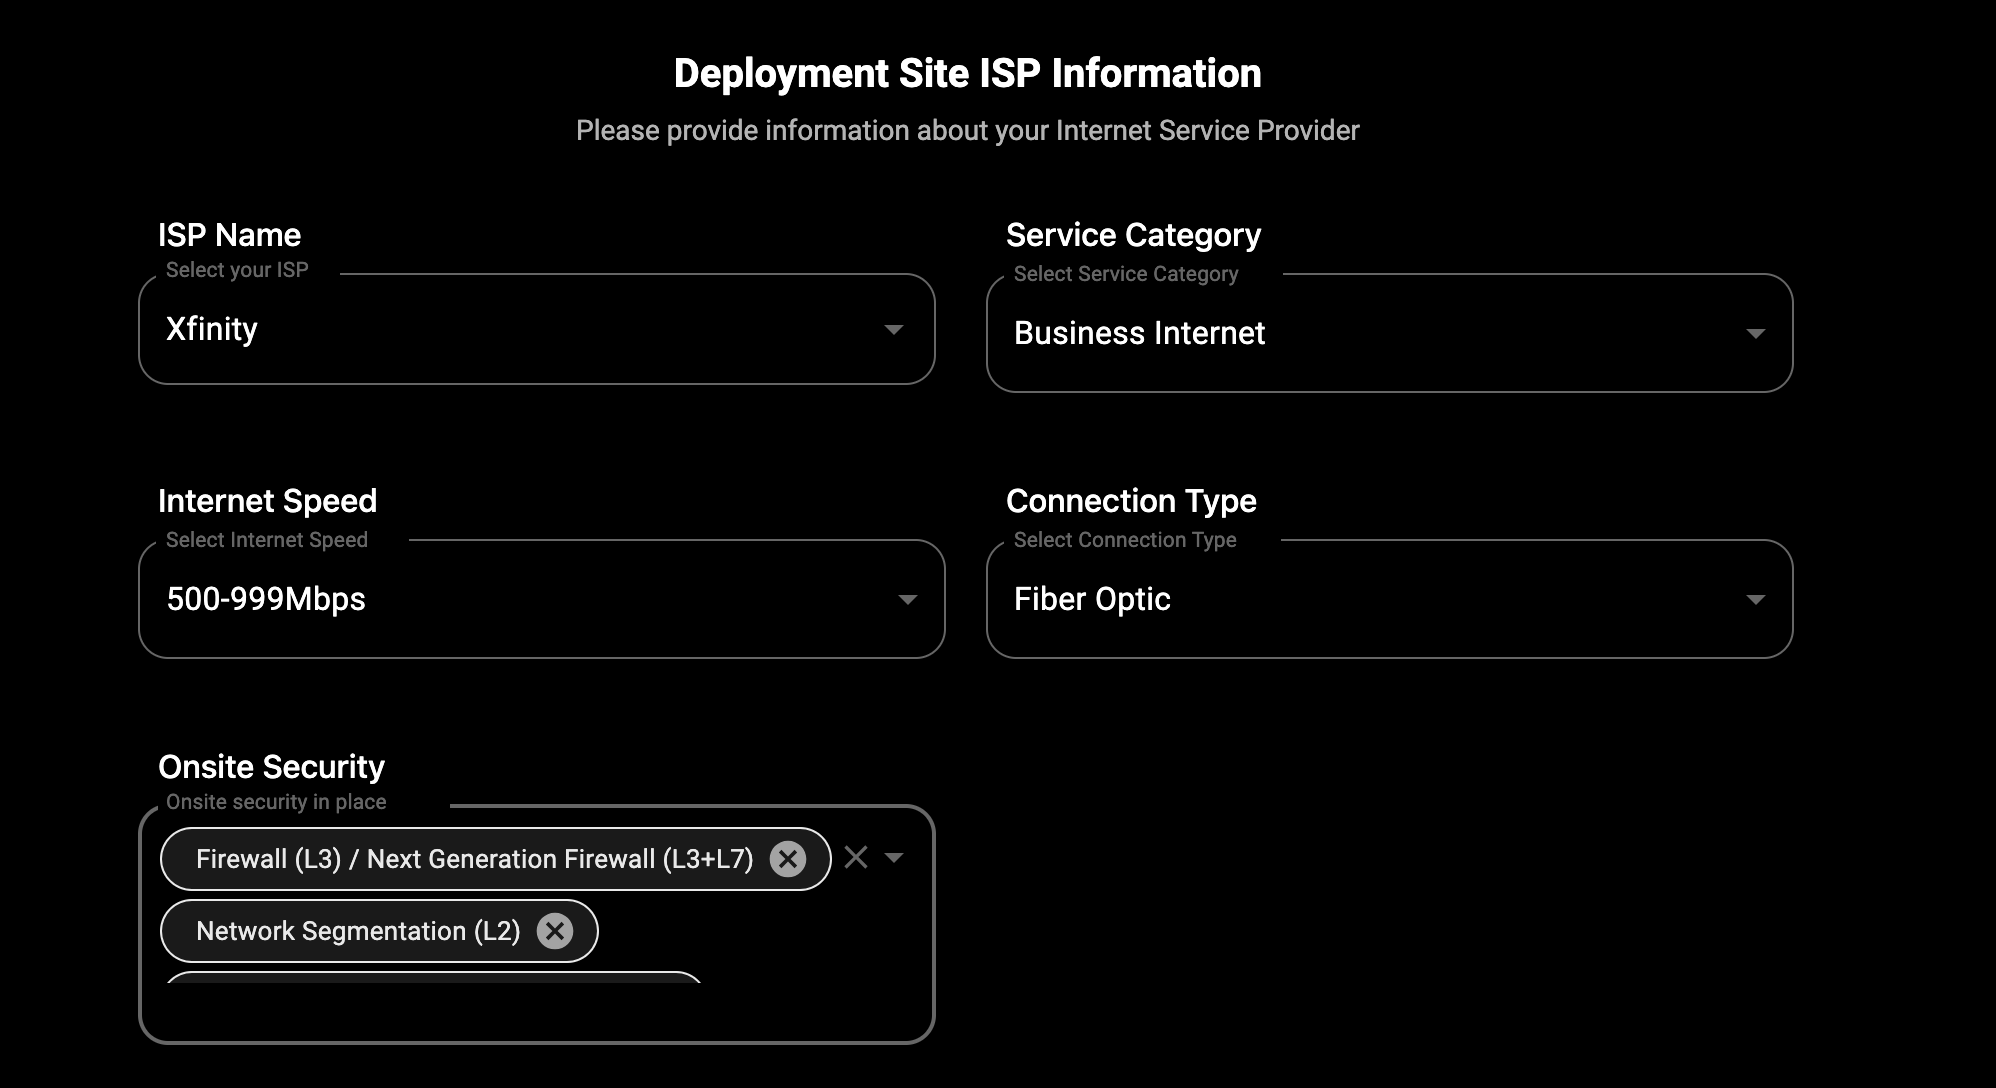
Note
For Onsite Security, choose one or more options from the dropdown. if you don’t know what it is, you likely don’t have it. Choose the “Default Network Security” option if you don't have any other security.
-
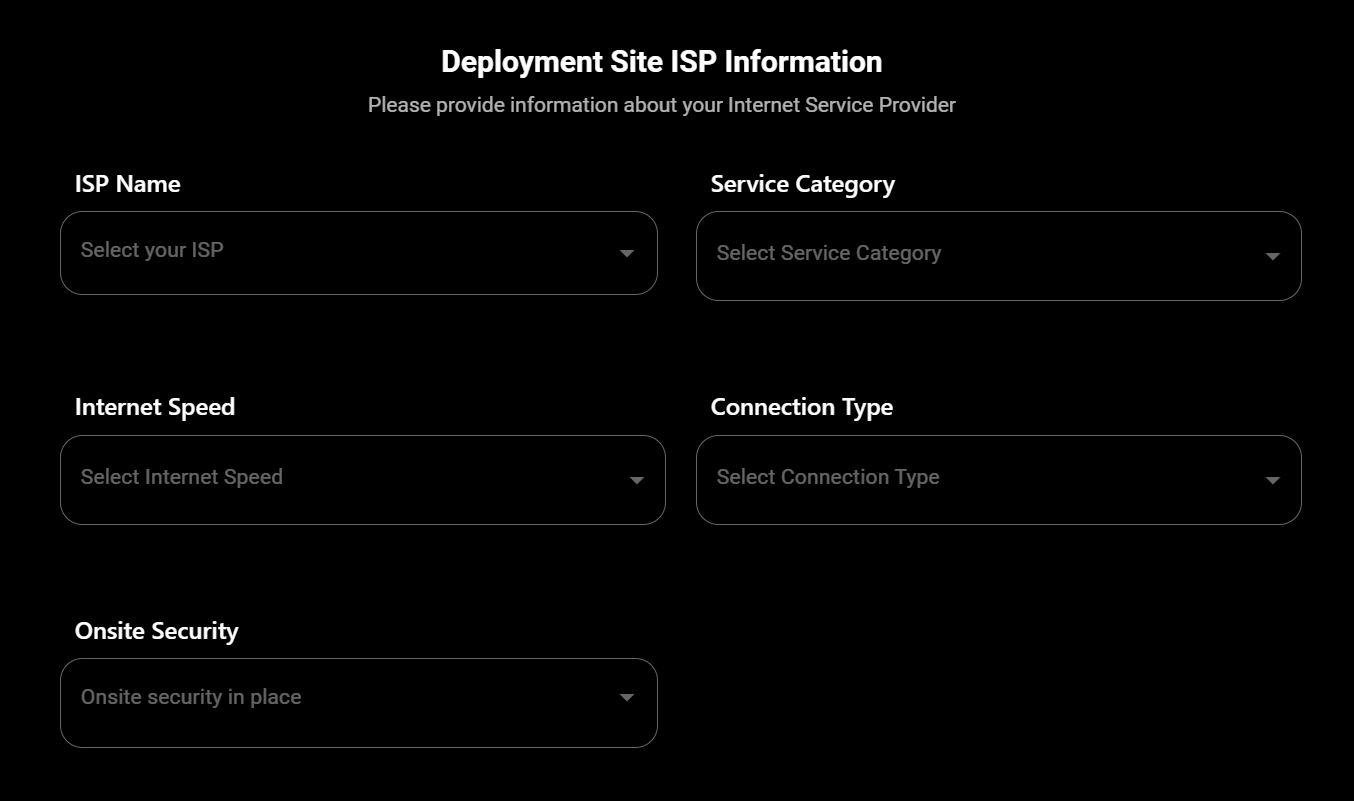
In this section “Deployment Site ISP Information” we will need to gather some important ISP requirements you must fill in. Please fill this out to the best of your ability.
-
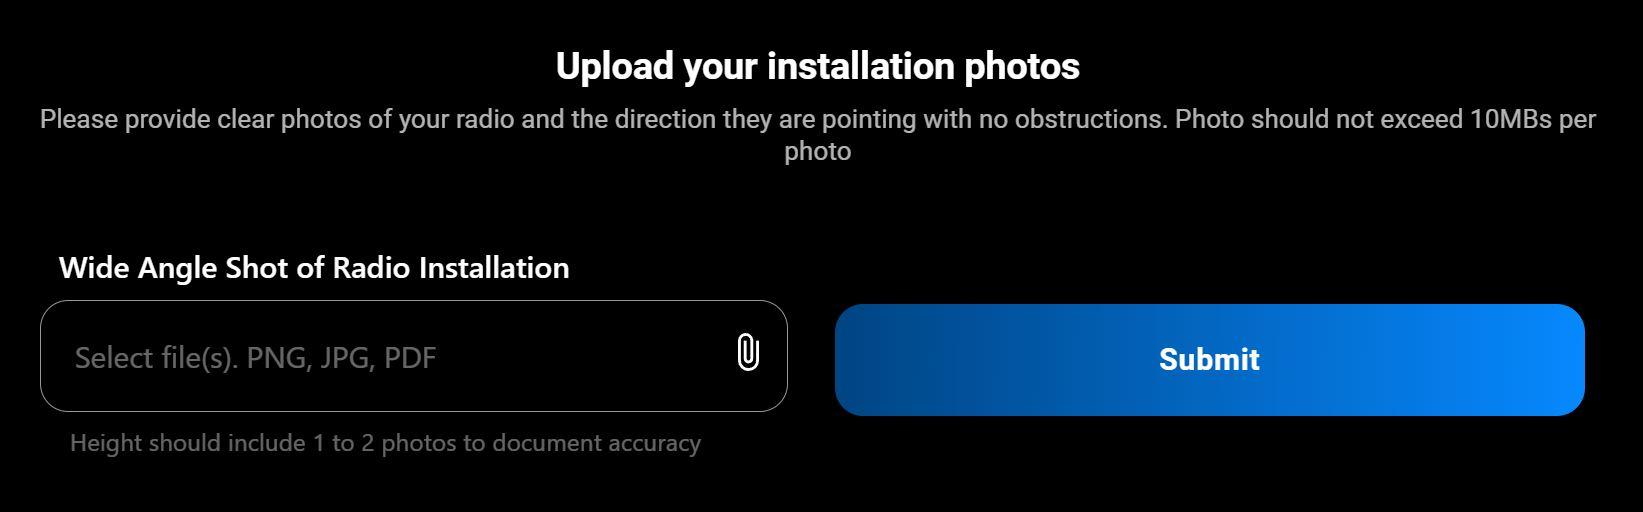
If you have updated Images of your AP deployments you need to upload you can attach new images before submitting.
-
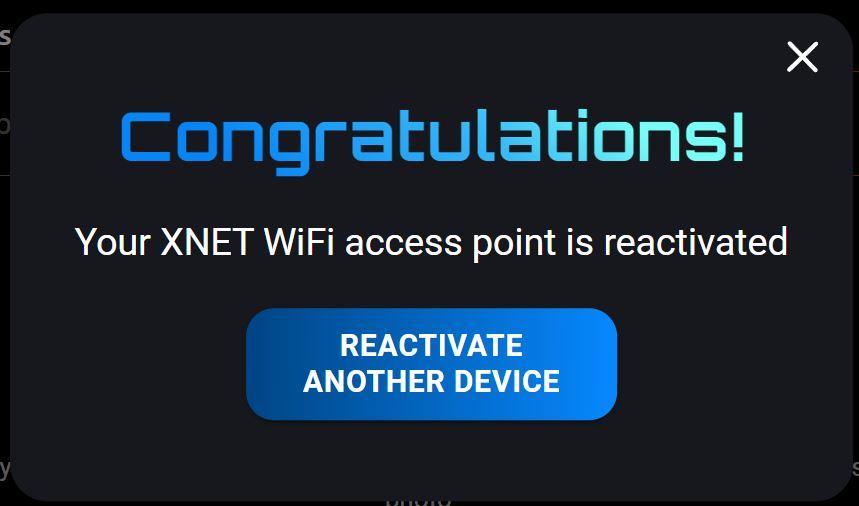
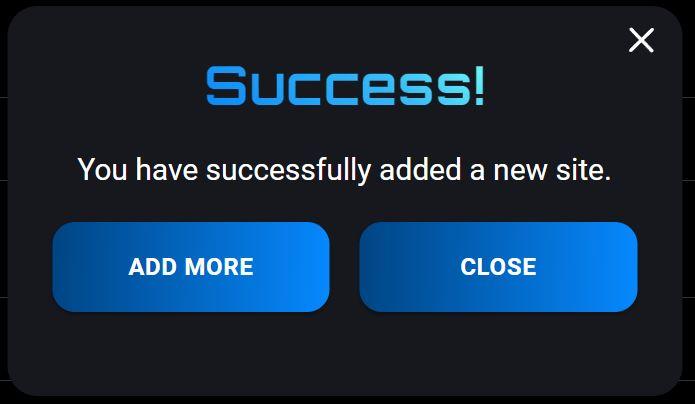
Lastly once you’ve hit the Submit button it will trigger a reactivation for the AP you have selected and save the information you have provided.